Beginner's Quilt - The Piecing
This is a perfect project if you are just starting out on your quilting adventure, you will learn how to construct rows of blocks, and then how to sew these together to match your points. You will then learn how to sew on a simple border, and once you have completed the quilting, you will learn how to attach a mitred binding to give your quilt a professional finish.
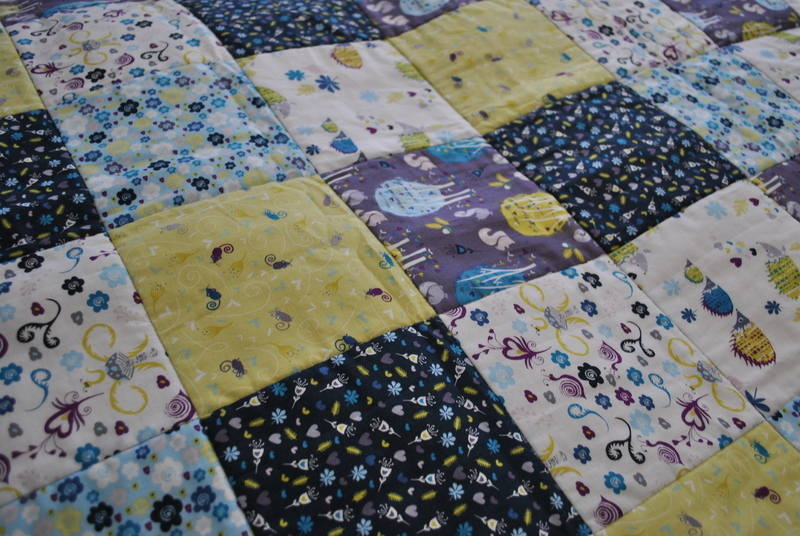
So for this project you will need:
Six fat quarters – not sure what these are, see Pre-cuts to find out more. If you want some advice on choosing your fabrics, go to Fabrics for more information.
40cm of a co-ordinating fabric for the border. You can choose to use an additional 40cm of one of your six fabrics from above, or a different one that will match, as I have done.
Matching thread for piecing – if you are using a mixture of colours, a medium grey or dark beige work well. You need a thread that will not show much.
Once you have completed your quilt top, you will need;
1.15m x 1.15m (45”x45") of backing fabric - see The Quilting for more details.
1.15cm x 1.15cm (45”x45”) wadding – for more on wadding click here
Other equipment you will need:
Rotary cutter, ruler and cutting mat - you can learn how to use these in How to Cut Fabric
Long flat-headed pins
NB: All seams allowances are ¼” unless stated otherwise.
Read through all the instructions before you begin.
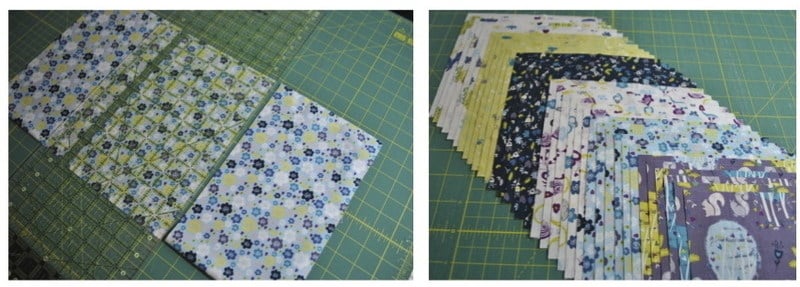
1) You first need to cut six 6½” squares from each of your fat quarters. For a help on how to do this, check out How to Cut Fabric. Cut two 6½” strips from each fat quarter, and these will give you six squares.
2) Once you have your 36 squares, find a flat clean space where you can lay them out, a floor (or if you’re really lucky, a design wall) is best as you can stand back to view the whole design - though I have used my bed in the past.
As we have six squares in six different fabrics, we are going to have six rows of six squares that will make a lovely square lap quilt.
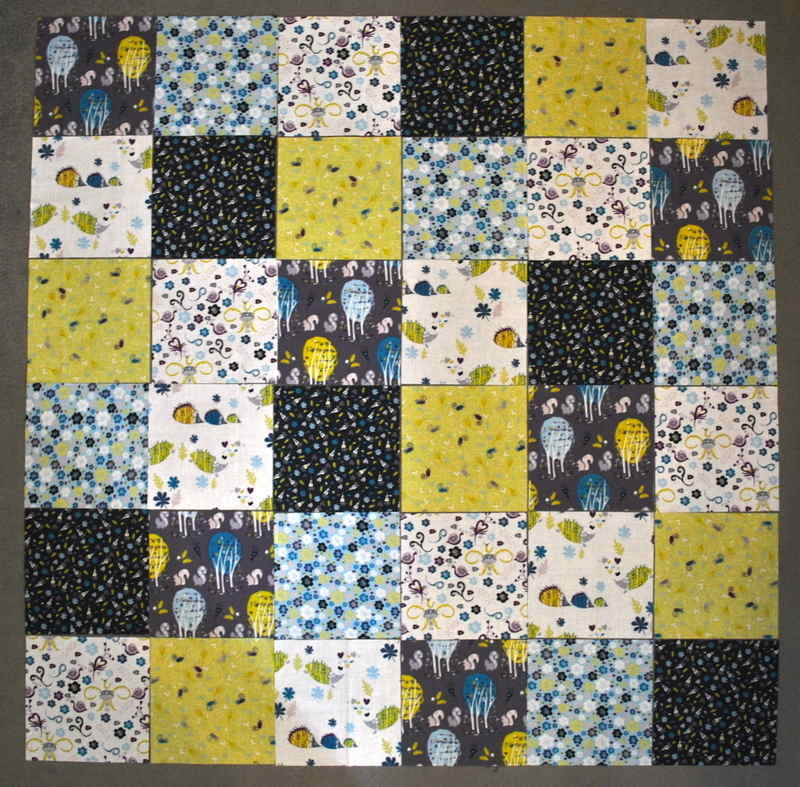
Start with your first row, and lay out one of each design. For the following rows I made sure I had one of each design in each row, going downwards, as well as across. You also don’t want any next to each other, or even too close if you can help it. If unsure, use my layout as a guide substituting your fabrics for mine. Once you've laid them all out, try concentrating on one design at a time to see if they are evenly spread out and not too close to each other. This can be a bit fiddly at first, but just play around with them until you’re happy with the layout – then take a photo – invaluable when you come to the sewing and lose track!
3) Now you need to take your fabrics to the sewing machine is this order. To do this, you make six small piles of squares. Work across from the right side of your quilt, and place the squares of each row on top of each other - so your last square on the right side of your quilt should be at the bottom of each pile, with the first square on the left on top. On six scraps of paper, write the numbers 1 to 6 and place on top of their corresponding pile.
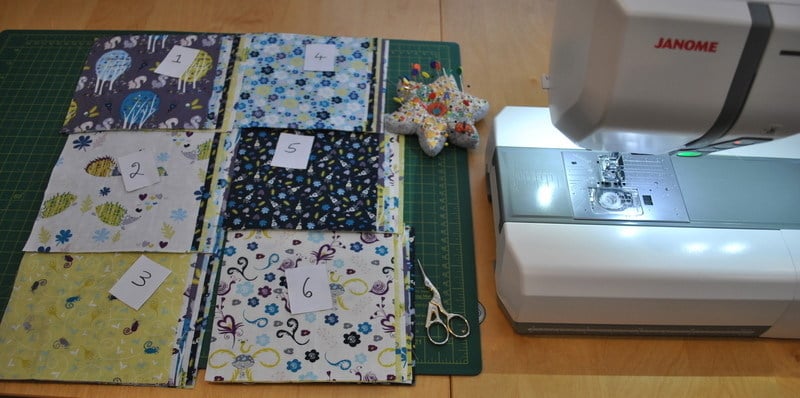
4) Place the piles of rows next to you at the sewing machine. We are going to sew the rows all at the same time, without breaking thread between each row – this will become clearer as we go on, promise!
Take the first two squares from pile no.1, place the second square on top of the first and pin along the right-hand side. This is an important part – if you pin the squares the wrong way round, the rows will not be sewn in the correct order, and you’ll get so confused, as I did the first time I tried this! Something else to keep in mind, if you are using directional prints, – in other words, that it matters which way round the fabric goes – make sure that you have the squares in the correct direction when pinning them together.

5) Sew these two squares together. . Then without breaking the thread, move on to do the same with the next two squares from pile no.2 – when you don't break thread like this, its called chain piecing. Carry on with the first two squares of the remaining four piles, then cut the thread. You should now have a chain of paired squares.

6) Now go back to the first two squares of row 1 at the top of the chain – open them out and pin the third square from pile no.1 onto the second square, right sides together, again checking for correct direction. Sew into place. Don’t break thread, but carry on with the third square for row 2, then row 3 and so on. At the end you will now have three squares in each row of your chain. Carry on this process for squares 4, 5 and 6 from each pile.
7) Now you need to press your seams. Lay your quilt top on to your ironing board, right side down, and starting with row 1, press the seams in your first row towards the left. As you get to each seam, gently pull the fabric towards the left so that your seams are fully open, though don’t pull too hard as your fabrics with distort.
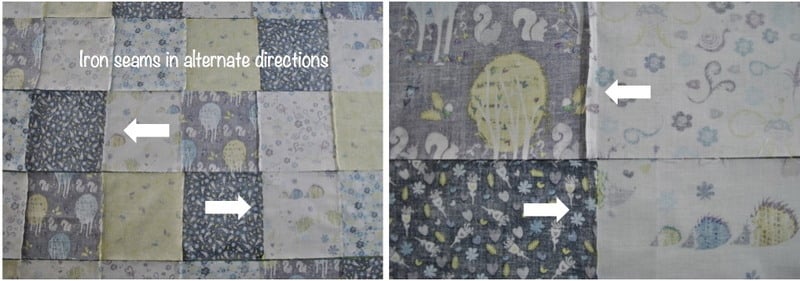
8) Do the same with row 2, but this time press the seams towards the right. Carry on with the remaining four rows, alternating the direction in which you press the seams as you go.
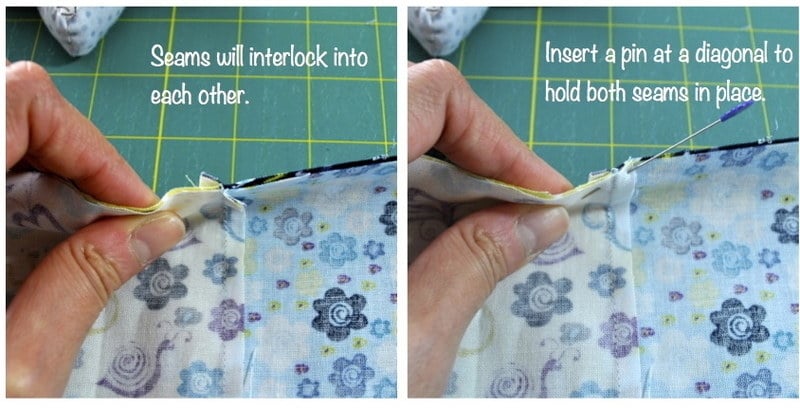
9) Now to sew you rows together. As you have sewn your seams in opposite directions on each row, when you come to pin them together you will see that they interlock into each other, making it easy to match up your seams to each row, yeah! You can pin one row at a time, or all the rows at once and get sewing, its up to you. So just sew one row to the next, take it slowly and make sure you hold the fabric firmly as you feed it through the machine.
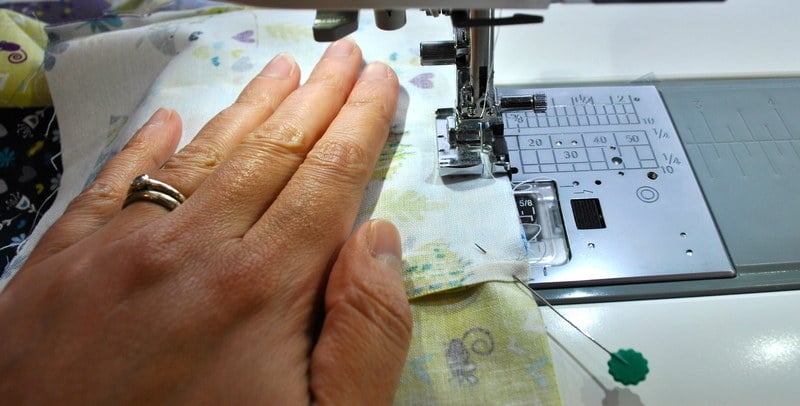
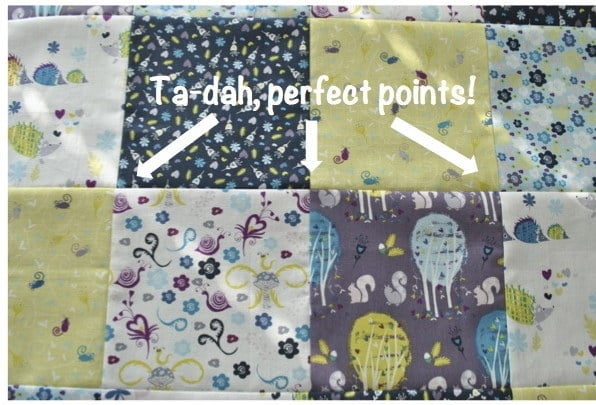
10) When you have sewn all your rows together, place your quilt top face down on your ironing board and gently press your new seams in one direction. Then turn it over and press thoroughly from the front. Now stand back and admire those matching seams! Cool or what!!
11) Now to attach your borders. From your 40cm piece of extra fabric, follow the instructions on How to Cut Fabric, but this time line up the 3½” mark on the ruler with your trimmed edge and cut four 3½” strips across the width of fabric (WOF).
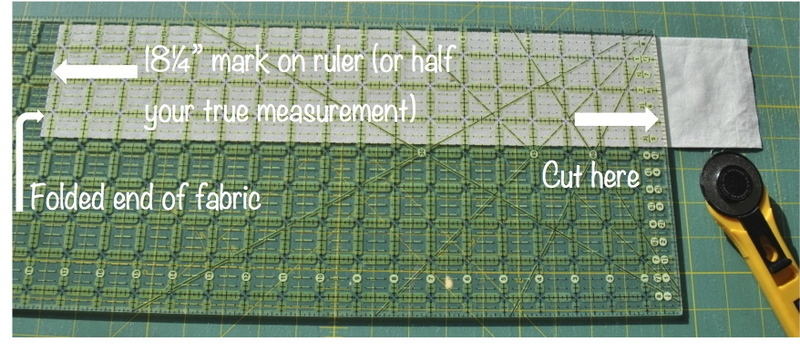
12) We know that the width of our quilt should be 36½”… however, sometimes our seam allowance may stray a little along a row, which could add a further ¼” or even ½” to the true measurement of the quilt – this is why an accurate seam allowance is very important in more complex blocks where you have more points to match. However, in this quilt, just measure the width across the centre of the quilt and taking this as your true measurement, cut two of your 3½” border strips to this length. To do this, turn a strip so it’s horizontal on your mat, work out half of your measurement, so if it is 36½”, this will be 18¼”. Line up this point on your ruler with the folded end of your strip and cut off the selvedge end. Unfold, you now have one 3½” x 36½” border. Do the same again.
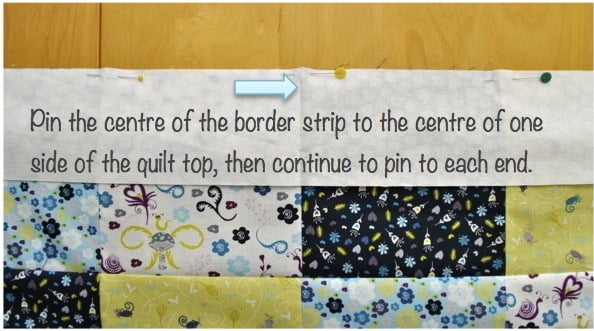
13) To attach your border strips, you pin them from the centre outwards. The creased fold in your border strip marks its centre so pin this to the centre mark of one side of your quilt top, then pin the rest of the strip towards each end. Do the same with the second border to the opposite side of the top, and sew into place. Press seams towards the border.
14) Measure the new width of your quilt top taking in your new borders. It should be 42½”, but again, if it's not, don’t panic, just cut your remaining border strips to your measurement. Cut your strips as you did before, in my case half of 42½ is 21¼” so I’ve lined this mark on the ruler with the folded end of my two strips and cut the selvedge end to give me two 3½” x 42½” border strips. Attach these as your did before, pinning from the centre outwards. Sew into place and press seams towards the borders. You have now completed your first quilt top, how good does that feel???!!
Now move on to The Quilting to finish your lap quilt.